create the application from scratch by first creating a xib and a corresponding view controller.
You’ll then modify the application’s delegate so that it loads the view.
1. Create a new Window-based Application in Xcode by selecting File | New | New Project and then selecting Application under iOS in the left column and Window Based Application. Select iPhone in the Device Family pull-down. Name the project AddViewProject.
2. In the navigation pane, expand the Classes folder. This folder contains the AddViewProject
AppDelegate.h and AddViewProjectAppDelegate.m files. These two files implement the project’s custom class that adopts the UIApplicationDelegate protocol.
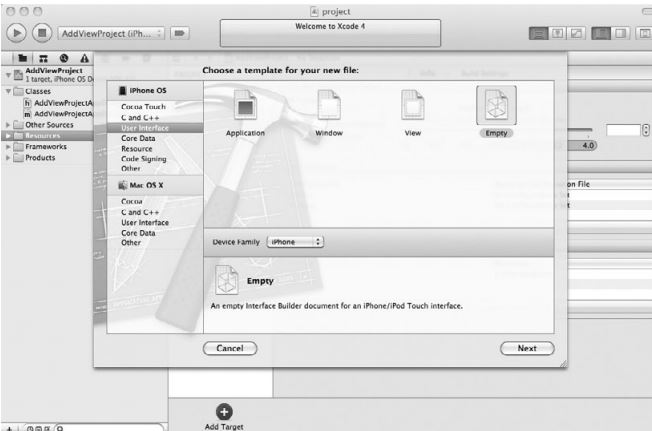
3. Highlight the Resources folder. CTRL-click and select New File from the pop-up menu.
Select User Interfaces from the New File dialog, and select Empty XIB (Figure 6-1). You may also have to select Resources as the group in the pull-down when naming the file.
4. Name the xib FirstViewController and click Finish.
5. Highlight the Classes folder. Select File | New File from the menu.
6. Select the UIViewController subclass from the Cocoa Touch Classes and click Next
You could have created the view controller first and then checked the “With XIB for user
interface” check box; Xcode would then have generated the xib for you.
7. Name the file FirstViewController.m. Click Finish.
8. Click FirstViewController.xib to open it in Interface Builder. Select View | Utilities | Object Library from the main menu to display the object library in the lower-right Libraries pane.
9. Scroll down to the View object, and drag and drop it onto the FirstViewController.xib Document window.
10. Select File’s Owner icon (the transparent cube to the left of the drawing area). Select View
| Utilities | Identity from the main menu to switch the Inspector pane to display object identity. Now select FirstViewController as the class in the pull-down menu.
11. Select the File Owner icon again. Select View | Utilities | Connections from the main
menu (or just click the connections button at the top of the Utilities Area). Drag from the circle next to View to the view in the drawing area to set the newly created view as
FirstViewController’s view outlet .
12. Select the view, select View | Utilities | Object Attributes from the main menu and then
click in the background color box to change its color.
13. Save FirstViewController.xib.
14. Open AddViewProjectAppDelegate.h, import FirstViewController.h, and create a property
referencing the FirstViewController class .
No comments:
Post a Comment